
I have always loved bread, much to my hubby dear's woes. The last time I was pestering him to get some bread, he said I should simply consider buying the bread making machine that I recently saw. Well after much deliberation, I decided against it, not wanting to overcrowd my already crowded and cramped kitchen. For the way things work out, I hardly get down to baking bread. It's more a muffin day at home, most times. Since having decided on Bakeathon, I have been only baking muffins and cakes.
Some almost twice, like in the case with Chocolate Cakes. I am happy that with this Bakeathon, I have at least cleared up my major bookmarked chocolate cake recipes. Well, there is some more left, which I am sure will be done next year. Now with just about four more bakes to go on, I thought I should now look at bread, buns, and whatnot. When Champa made her best of the year post, she reminded me again of the Garlic pull-apart bread that she has made. I adapted today's recipe from hers, being fondly looking at that for a while. The bread came out so beautifully and softly. I really have to thank Champa for the wonderful recipe.
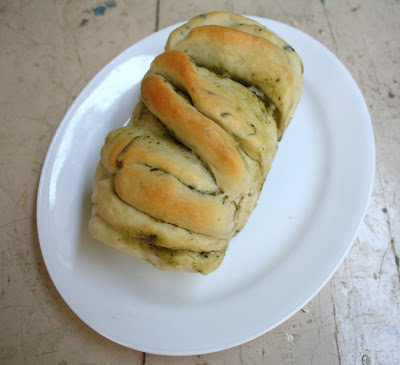
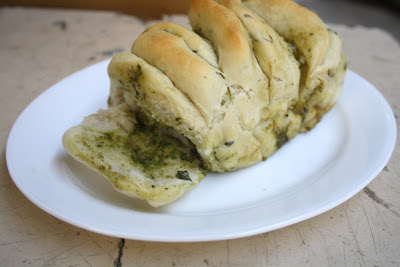
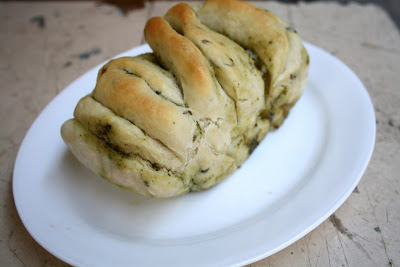
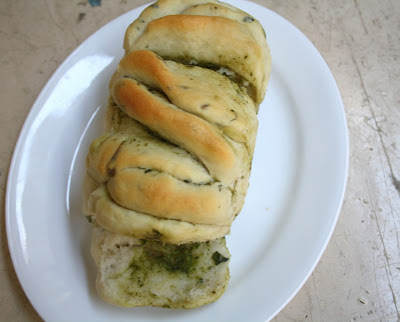
Spicy Mint Garlic Pull Apart Bread
I had the weekend off, and Saturday went off just relaxing. Though I had so many posts to make, I just let the day pass by, and Sunday was so hectic. I must have made about six different recipes, making sure I covered my BM and Bakeathon. The oven was eternally on throughout the day. I was thankful it has been obedient enough to bake things well.
With the vacation started for the kids, they have been so busy playing throughout the day. Konda kept saying she was bored, so I roped her in for clicking the step by step pictures. Since there were so many, I thought making a collage of them would suit well. We enjoyed this bread so much that I really won't mind making it again soon.
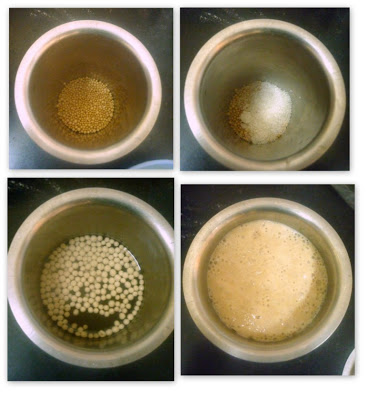
 Proofing the Yeast
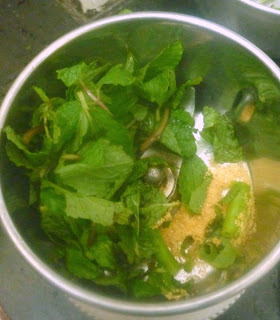
Made the paste for the spread

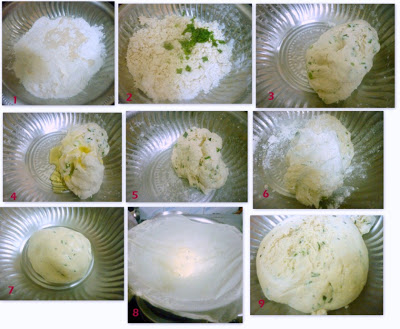
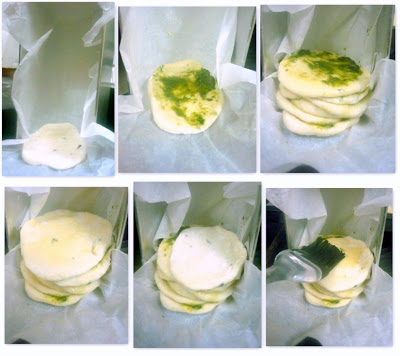
Stacking the layers for getting the loaf in place.
The final baked picture with the perfect soft crumble!

Ingredients:
(Makes one 9 x 5 loaf)
For the Dough
All purpose flour - 3 cups
Warm water - 1 cup
Salt - 1 1/4 tsp
Sugar - 1 tbsp
Olive Oil - 2 tbsp
Active Dry yeast - 2 tsp
Green chilies - 2 chopped fine
Mint leaves - 6 chopped fine
Butter - 1 tbsp
To make a paste:
Oil - 2 tbsp
Salt to taste (about 1/2 tsp)
Green chilies - 3 chopped
Mint leaves - 2 - 3 TBSP
Garlic powder - 2 tsp
How to make the Pull apart Bread.
For the Yeast proofing
Serve it warm


Champa says
It really has come out very good. See, I told you yeast baking is not hard.
Sona - Quick Picks says
interesting recipe...Sri...!
Arthy Suman says
I love garlic bread adding mint is something new to me...
Sangeetha Nambi says
Wow !! That's super dooper bread...
Vijayalakshmi Dharmaraj says
yummy...
KAJU FLOWER
VIRUNTHU UNNA VAANGA
kausers kitchen says
Wow it looks perfect...great work dear...
Nivedhanams Sowmya says
very different rolls!!! so tempting and so lip smacking!!!
Sowmya
Ongoing Event - Eggless Bakes and Treats
Ongoing Event - SYF&HWS - Ginger