
For people down south, mixture may not be something very different or unique as it gets done for every festival or function at home. A decade ago, one wouldn't think of buying such savories or sweets from Shops, but these days you get everything from the shop. Yet it can't beat the taste like the one homemade one!
Amma is known for her lip smacking mixtures or the South Indian Chivda. The many things that go into it can be variable, yet the constant ones of the mixture makes it such a delicious snack time treat. She always makes this for Deepavali. But this season we couldn't make it. Since I told her that I got to learn this, she said she will make it again.
So I learnt and made and also tried to capture it as essence. This was to be part of my book. But I thought having taken step by step pictures, it would be more beneficial sharing it here.
Lets get the oil hot while we mix the batter ok!
For minimum and better usage of the oil, the ingredients are got to be cooked in the manner specified.
Preparation Time : 15 mins
Cooking Time : 15 mins
Yields : 1 & 1/2 kg of savory mixture app.
Cuisine : South Indian
First lets get the Omapodi ready as explained in the previous post!

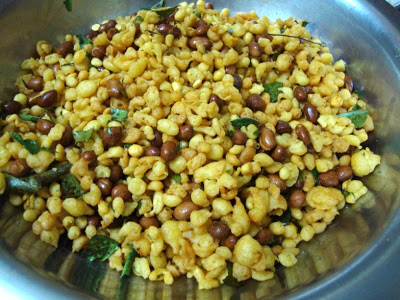
 Next fry the whole raw peanuts/ groundnuts till golden in colour. Then goes the Fried Gram till done. Fried gram does not take much time. So keep eyes wide open to remove them as soon as you put them in the oil. Cashew nuts are fried followed by this. Wondering where they are?..well they were in the mixture finally..:)
Sprinkle 1/2 tsp chili powder and salt to taste over the fried nuts and mix.
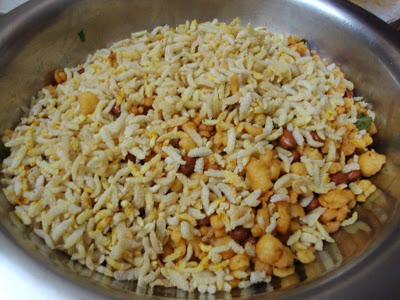
 Finally goes the Poha or Attukulu. This also takes hardly few seconds for getting fried and should not be left for long. This tends to blacken the oil, so this is the last item to be fried. Remove and drain on a kitchen towel. Sprinkle a pinch of turmeric powder and salt over the fried poha and mix.
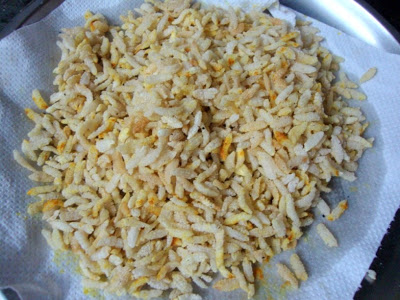 Now comes the mixing part, after all this snack is called the mixture in the South right!
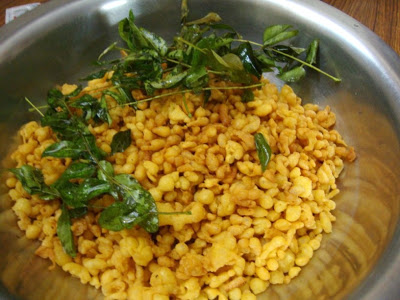
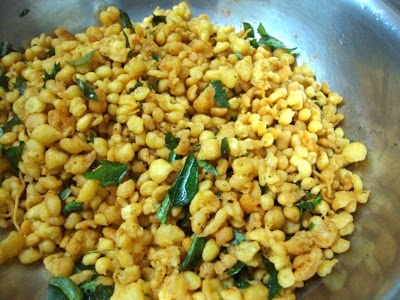
First take the kara boondi in a wide mouth bowl, sprinkle little salt and chili powder. Crush the curry leaves, garlic and mix to the boondi roughly.
 Then add the fried nuts. All these can be tossed about when you have a good wide bowl.
 Top it with the fried poha..
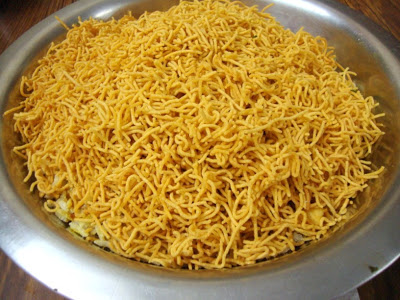
 Then goes the crushed Omapodi or Sev
 Now with both hands mix everything together from bottom to top and repeat until you see that everything is mixed well.
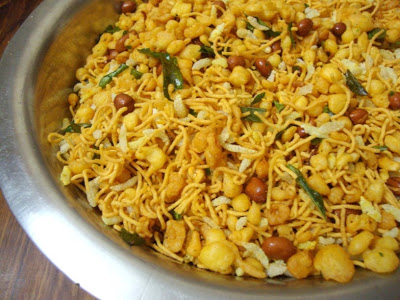 Finally check for salt and spice, you will surely need to add some more chili powder. So sprinkle it over the top and repeat the process of mixing together.
I know what you are thinking! No you won't feel the chili at all..
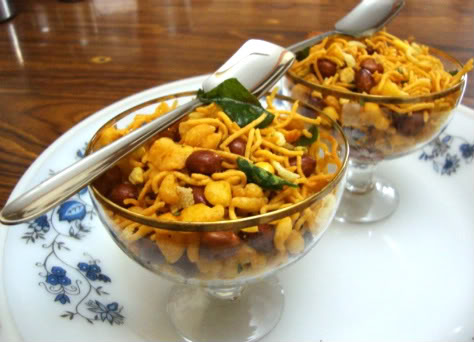
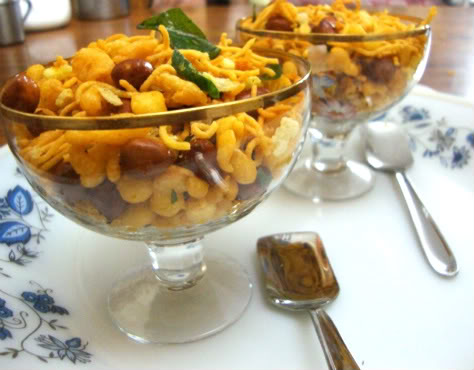
Finally fill up pretty glasses and click pictures of them for posterity!
Now let me recap the recipe in one place!
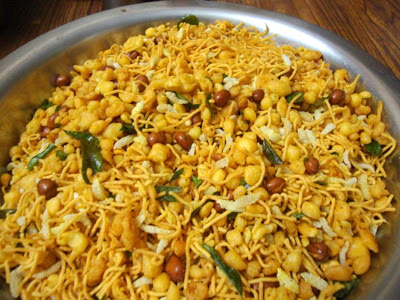
South Indian Chivda or Savory Mixture / Madras Mixture!
Omapodi as made here.
For making Kara Bhoondi
Besan - 1 cup
Salt to taste
Cooking Soda a pinch
Water for mixing
Other ingredients needed:
Peanuts - 1/2 cup
Curry leaves - 2 -3 twigs
Whole Cashew nuts - as per wish
Fried gram- 1/4 cup
Beaten Rice / Poha / Attukulu - 1/2 cup
Turmeric powder - app 1 tsp
Chili powder - 2 -3 tsp (as per taste)
Salt to taste
Oil for deep frying
Special Utensils:
Boondi ladle for making boondi
Slotted ladle
Kadai / Deep bottom pan for frying
Method to prepare:
For making the Kara Boondi
In a bowl , take the besan, salt, cooking soda and mix well. Add water slowly and mix to get a lump less batter. The consistency of the batter should of pouring one. When you pour a ladle ful of batter, it should fall down freely.
Heat a pan with oil. When it is hot, scoop a ladleful of batter and place the boondi plate or ladle over the hot oil and pour over it. The boondi ladle should not rest on the pan, but gently hover over it. And you can press down the batter, which will fall like drop shaped boondi into the hot oil. Simmer the flame and cook all sides to ensure you get a crispy boondi.
Repeat till you are done with the entire batch.
Other ingredients.
Wash and pat dry the curry leaves along with the stack. Drop them into hot oil. Ensure you move away as it will sprinkle out oil. Add few crushed garlic along. Fry for a min and remove.
Top over the kara boondi.
Next add the peanuts, fry till it is cooked on all sides. Then goes in the cashew nuts followed by the fried gram. Remove all fried nuts to a kitchen towel and sprinkle chili powder and salt over it.
Finally goes in the beaten rice or poha into the hot oil. This has to be fried last as it tends to leave out black colour to the oil and also tends to absorb more oil. This takes a minute to get cooked. Remove to a napkin/ kitchen towel.
Mixing the Mixture!
Take a wide mouthed bowl, add the kara boondi first, crush the curry leaves and garlic and mix along with the boondi.
Next add the fried nuts, followed by poha, finally with crushed omapodi.
When you are done with mixing with all the ingredients, check for salt and spice. Add more chili powder over it and mix again.
Notes:
- The batter for the boondi should be very thin and should be cooked very crisp.
- Pat dry the curry leaves before dropping them into hot oil.
- Remember you are adding salt at various stages, so check before you add each time.
- When it becomes cool, store the mixture in a air tight container.
- I suppose the shelf life can be about 10 days but I can't vouch because it never stays for that long at home!


RAKS KITCHEN says
Nice presentation srivalli! And delicious mixture too! I still remember, I will mix sugar in this and eat 😛
Tina says
Wow perfect snack...Crunchy and yummy...Ma all time fav....
jayasree says
Superb pics.. Though making mixture is easy provided you have all the ingredients ready, It generally gives an impression as laborious and time consuming. And your post clears all that.
Love the vibrant color of the mixture.
anu says
sooper yaar. You have explained it very perfectly. I will try it at home soon.
Priya says
Chivda looks prefect for a cold winter evening...feel like grabbing a bowl rite now..
notyet100 says
thnks for the yummy pictorial,..
chakhlere says
It has been my favorite for all time. I really miss it!!
Send it that whole big bowl here.plsssssssss!!
Nithya says
Yummy mixture and lovely presentation 🙂
shanthi says
mixture is really crispy
♥♥♥Ria♥♥♥ says
I can feel the Krrrunch here! 🙂
Prajusha says
This chivda looks delicious. beautiful pic..
Eagerly waiting 4 ur cookery book.
meeso says
Yum, I can almost taste it!!! Looks too good 🙂
RV says
Nice one Srivalli. Chivda has been in my todo list for long time, your pictures tempts me to try this one soon.
Supriya says
Wow Srivalli, your mixture is awesome.
Ramya Bala says
looks v.delicious sri...
Valarmathi says
Looks yummy 🙂
Bhawna says
All time favorite, step by step presentation making it easy and yummy to resist. I'm sure 99 persent will try it at home and I am one of them.
jayasri says
wow, lovely clicks,who wouldn't say no to this!1, well explained valli, they look very crispy and colourfull
Helene says
What a delicious meal.
Jhanani says
I think no one else could explain it so clear and detailed. Thanks for sharing.
Priya says
Hi Srivalli,
Here I am another fan of yours!
I was looking at your blog for some dinner ideas. We mostly avoid rice at nights. So it is Rotis most of the time. The days that my hubby is in town, makes sense to make rotis for 2 people but when he is not in town, which is atleast 2 nights a week, I don't feel like making the elaborate subzi-roti fare. I give my baby rice and so I end up eating rice too and feel bloated the next day!! Any idea for a single person? Light, yummy and quick? I make upmas mostly for breakfast except Godhuma Rava upma (reserved for supper!)
Also I want to know, my daughter is skinny not underweight though. So I give her rice most of the time at nights. If I regularly give her rotis, will she lose weight?
Srivalli says
Hi Priya, thank you for your kind words. Will upload some ideas that I have been collecting over time. When making a subzi roti becomes hard to make, try doing stuffed parathas, meaning including the veggies into the atta and make parathas..it's more healthier.
If your daughter is not underweight, then you need not worry. Even Konda is skinny and she is very picky..:)..And giving her rotis everyday will not be a problem too..eating rice or rotis is more of a regional thing and will not affect health. Each whole grain has its own place.
Thanks for dropping by and leaving your feedback. Do let me know if I have addressed all your questions..
-Srivalli
Anonymous says
Hi there. I just want to let u know that I've been making this every year for the Muslim's eid and have always been praised for the originality of its Indian taste, texture & quality.
They do last long when store in an air tight container. Sometimes I also give friends as gifts when I visit them.
The amazing thing is that they never believe I make them from scratch and always push me to tell them which Indian I bought them from.
LOL... (because I'm Southeast Asian malay)
Thanks so much for sharing the recipe, tips and also for the step by step preparation.
Love
Cadbury
Srivalli says
Cadbury I am so happy reading your comment. Thank you for the feedback..:)